After my new found love of green smoothies, I got excited and started thinking......what else can I throw in there??? Please raise your hand if this has happened to you and let me know when to stop!! Of course, strawberry banana is still my main "flavor" combination so far...mostly because that's the bulk of the fruit I have right now in my fridge.....here is a smoothie I made yesterday because a) I was really craving one at lunch and b) I had made just a chicken breast for lunch and couldn't decide on a side so I opted for a smoothie instead! Because I needed something a little more substantial then just a couple pieces of fruit and ice, I added some oats. Yep, dry oatmeal. I had heard of someone doing this but I can't remember where so if I sound like I am copying your ideas without crediting you, I'm sorry!!!! Please let me know so I can properly credit you in the future!! So, here is my super yummy and super duper satisfying lunch smoothie...
Strawberry Banana Oat Green Smoothie
1/2 cup frozen strawberries
3/4 banana, frozen
1 cup water
1/4 cup 1% milk
1/8 cup dry quick oats
1 big handful of fresh spinach
1 cup (or more if needed) ice cubes
Throw everything in the blender and blend/chop/mix/whatever buttons you have until smooth! (our blender has a lot of buttons and I just end up punching things here and there until it's smooth....for real. May not be best for my blender...and that line of thinking may be why my microwave died last night...DIED. DEAD. KAPUTZKIE. That's another story....too painful to discuss right now. *sniff*)
Enjoy!! <3

Everyday thoughts, laughs, and little tids and bits of our life. Laughter and tears and everything in between..including some yummy food and fun crafts. Hope you enjoy!
April 19, 2012
Fitter Fave Foods-Spaghetti Squash with Mediterranean Vegetables
Let's talk about something for a second....it's called Spaghetti Squash. I have seen it all over the place for a long time and have always wanted to try it but, despite my love of vegetables, I had never made one. Ever. So, last night, I decided to give it a whirl. it was EASY and you know what??
IT WAS GOOD!
Husband even liked it and ate TWO helpings!
There are many different uses for spaghetti squash but, I was trying to keep our meal super healthy and light so this is all I did....
Spaghetti Squash
- Preheat oven to 350F
- Cut your spaghetti squash in half lengthwise and (just like you do when you are going to carve a pumpkin!) scrape out the seeds and stuff (that's a technical term here...). I got a fairly large squash and there really wasn't much "stuff" to be removed so it just took a second
- Place your squash cut side down in a glass baking dish. I used two 13x9 inch pans because I couldn't fit both halves in one pan. You don't have to coat your pan with anything either...just an fyi
- Bake for 35 to 45 minutes until tender. I took mine out after about 35 minutes and had to stick it back in there for about 6 more minutes. Because I have never made this before, I wasn't really sure what "done" was! You could easily eat it after 35 but after the additional time, it was definitely more tender
- Using two forks, shred that puppy! Just scrape the insides of the squash halves out and transfer to a bowl. Voila! Easy! I used a little fresh ground sea salt and black pepper here but did not add any oil, butter, etc like you would with regular pasta. It didn't need anything!!
- Toss in your favorite sauce, veggies, etc or top with the following recipe to really make it yummy!!
This next recipe is closely based off of one from the Better Homes and Gardens "Healthy Family Cookbook", available here, that I mentioned the other day (remember the stuffed peppers?).
Mediterranean Vegetables
Ingredients:
- 2 medium zucchini, sliced
- 2 heads of fresh broccoli florets, chopped
- 1/4 red onion, diced
- 1 cup light chicken broth, I use this
- 1 medium garlic clove, diced (I actually didn't have this....I did buuuuuuut it apparently had been around a while and suddenly I had a garlic plant instead :/ Whoops!! So, I had to use a little garlic powder...not as good as the real deal would have been)
- 1/2 cup pasta sauce
- 1 tbsp dried basil, or please use fresh if you have it!!
- salt, pepper, red pepper flakes, to taste
- (if you like tomatoes, please add some, Please? Husband does NOT like them so they are still in my fridge....but, man oh man, they would have been YUMMY!)
In a large pot or Dutch oven, combine zucchini, broccoli, onion, garlic, spices, and chicken broth. Basically, throw everything but the pasta sauce in there! Bring that to a boil. *Note: 1 cup of broth won't seem like much here and you might be tempted to add more so that it all soaks and boils...DON"T DO IT!!! I am speaking from experience here....once that puppy gets to boiling and producing a smidge of steam, you will have PLENTY of liquid and if you do add extra chicken broth, like someone might have, ahem you will have to drain it off and feel silly in about 8 minutes. Just sayin.....
Reduce heat and simmer, covered, for about 6 to 8 minutes or until veggies are done. Drain off your extra chicken broth if you have any...don't say I didn't warn you! then toss vegetables in the 1/2 cup of pasta sauce. Done! Serve immediately.
You could also add some chicken breast to this and it would be super tasty but we thought we would try keeping dinner super light, all veggie style....and, honestly, I used my last piece of chicken at lunch yesterday....so, there was no chicken available anyway! But do note, spaghetti squash is FILLING!!!!!!!!!!!! One cup of squash plus about 1 cup of the vegetable mixture on top was plenty for me to be satisfied for dinner....I did end up eating another 1/2 portion but just because it was yummy....after that I was comfortably satisfied but not stuffed in a miserable-why-did-I-eat-all-of-that sort of way.
April 17, 2012
The Green One
As part of our getting healthy, we are cutting out one of our favorite after dinner activities (or at least cutting down the frequency!) and that is.....


going to get ICE CREAM.
we like ice cream. a LOT.

ice cream...

more ice cream...well, frozen yogurt but still...
you get the picture.
We love it. We love to pile in the car as a family and go to Andy's or Shake's after dinner and even our extended family loves it. We eat with my in-laws and grandparents-in-law (or however you say it) at a minimum of once a week....every Friday night and after we eat dinner, we pile in our cars and head to Braum's and get ice cream. Every. Time. So, while we can't cut out ALL of the ice cream stops, we can at least stop going so often as a family of three and eating frozen custard SO often. But, what about dessert? While I have been trying to make "healthier" desserts (previously posted brownies, graham cracker crust, etc), what else can we have? And then it hit me....what about a smoothie? It's cold, it's sweet, it's yummy....so I thought, let's give it a whirl! (no pun intended on the blender there..) On my first "getting healthy" grocery trip, I focused on fruits and vegetables and some lean meats. I picked up fresh and some frozen fruits for snacks and have been making smoothies that consist of bananas, mangoes, strawberries, pineapple, etc and man, they are GOOD! Not only are they good, but they are good for you! The fruit is sweet enough that I don't have to add any sugar which is a definite plus in this momma's book! No more sugar hangovers or stomach aches from over indulging in sugary desserts.....just good, fresh, yummy stuff.....if you think I am starting to lose is here, just get ready for this next item I am about to show you:

yes, it is green. I did it. I made a green smoothie.
and, you know what??
IT WAS GOOD!
Are you still there? Did I run you off with my glass of green gunk that looks like only the Hulk himself could love it?
For those of you that have not abandoned me thinking that the next thing I am going to tell you is to eat only organic, go hop on a love bus and move to a commune, let me explain what this is. It is a strawberry banana smoothie with spinach. yep, you heard me right, fresh spinach. but, do you want to know what it tastes like? JUST STRAWBERRIES AND BANANAS!?!?!?!? I kid you not. You don't believe me? Ask my toddler.....every time I have made one of these, he hears the blender, RUNS into the kitchen, and asks for a straw and wants to drink it with me. So, if you have kiddos that aren't big fans of munching on fresh green leaves (and, seriously, I don't know many kids who are...or adults, really!) PLEASE give this a try. and try it for yourself too. I have been having one of these green shakes a day for about 4 days or so and I feel AWESOME! More energy, I am drinking less coffee (if you know me really well you are either laughing uncontrollably at this statement or you have fallen out of your chair with shock...are you ok? hope you didn't hit your head!?) I kid you not. This thing is loaded with vitamins and I can tell a noticeable difference in my body and my energy level since I started making these. Want to give it a try?
Strawberry Banana Green Smoothie
1/2 medium banana, fresh or frozen (a side note here-have you ever had frozen bananas as ice cream? see below)
1/2 cup strawberries, fresh or frozen
a big handful (about 1 1/2 cups) of fresh spinach, washed
1/4 cup of skim milk (this is optional! they are good without the milk as well)
about 8 ounces of water
ice cubes
Place all items in blender and mix well! I will tell you that I add a packet of sweetener to my smoothie yesterday (Splenda or Equal) just because I wanted a little sweetness with the tart strawberries. As I make more of these, I am going to be experimenting with different fruit combinations and hopefully not use this in the future. I have done every "diet" under the sun and have done the "South Beach" where they limit your amount of sugar or sugary fruits, etc. But, something to think about here is that sugar from fresh fruits and sugar added to a cookie or cake are NOT the same thing. I just am not a fan of any diet that says you can't eat fruits and vegetables. I just don't consider that to be very healthy. Everyone has a very different opinion of what "healthy" is but to me it's not just about losing weight. It is about the long term. I don't want to cut out all my carbs, feel terrible and lose 5 pounds only to gain it back (and more). In our house, we are going to be eating plenty of yummy fruits and veggies along with lean meats, etc. and the occasional splurge...because something I have learned is that sometimes you just gotta have something like a burger. It is ok to eat those things sometimes...it is just not ok to eat them ALL the time. Anyway, this has been a long rambling post so I will leave it at that and just say, please give this a try...at least for a few days and let me know if you notice any difference in how you feel/look, etc!!
I almost forgot!! Frozen bananas!!! So, next time you have some bananas that are getting ripe fast then you can use them, slice them up and stick them in the freezer. When you want something sweet, take your frozen bananas and mash them up with a little cocoa powder and make "ice cream"! You can also add some peanut butter to it as well! Delicious and healthy!
Fitter Fave Foods-Chicken and Black Bean Stuffed Bell Peppers
As part of our healthier life style, Husband and I decided that we need to stop eating so much ground beef and start eating more chicken, lean beef, etc. because although I always buy the lean beef, it still isn't THAT great for you....at least not if you eat a beef based meal almost daily. I already own stacks of "healthy" cook books but felt like I wanted to get some new inspiration so I headed to our local library and checked out a few cookbooks. One of the ones I checked out was "Better Homes and Gardens Healthy Family Cookbook", available here. The first recipe I tried from this cookbook was for Black Bean Stuffed Bell Peppers. I ran this by husband and he said it sounded great and would be even better if I added some chicken to it so I did! Here is my adaptation of the original recipe:
Black Bean and Chicken Stuffed Bell Peppers
Ingredients:
2 green bell peppers, cut in half, with stems and seeds removed
1/2 cup chopped carrots (I used my peeler to "grate" the carrots into thin pieces instead of chopping)
1/2 cup red onion, diced
1 can black beans, rinsed and drained
8 oz boneless, skinless chicken breast, diced *see note below
1/2 cup frozen yellow corn kernels
1/4 cup shredded cheddar cheese (this is just to sprinkle on the top and can be omitted)
nonstick cooking spray
Directions:
- Preheat oven to 350 F
- In a large skillet over medium heat, cook chicken until partially done (if you cook this all the way, the chicken will become dry during the baking so I just cooked until the outside of the diced pieces were white then removed from heat). I added some seasoning to my chicken...I used this and it was SUPER good!!
- In a large bot of boiling water, cook the bell pepper halves for 3 to 5 minutes or until crisp tender (that is the word the cookbook used, I thought "what the heck does that really mean?" and just threw them in there for 4 minutes to be safe...) Remove and invert onto a paper towel to drain.
- Add the carrots and red onion to boiling water and cook for 2 minutes. Add frozen corn kernels and cook for additional 2 minutes. Remove from heat and drain well.
- In a medium bowl, combine corn/carrot/onion mixture with black beans and mix well.
- Spray a 9x9 glass baking dish with nonstick spray and place peppers open side up in dish. Fill with 1/4 of chicken then top with 1/4 of the bean mixture. Top with a pinch of shredded cheese and bake at 350 degrees for 25 minutes or until done.
These were really good and super filling! The only thing I will change when I make these again is to add some salsa to the bean mixture and maybe to garnish. It may also be good with some diced green chilies? The original recipe calls for adding ranch or Italian dressing but I didn't have any so I couldn't although I don't think I would have liked the flavor as much with it in there!
*note from above: a digital food scale. When we registered for our wedding, people laughed at the fact that I added a nice Digital Food Scale and it gets used in our house DAILY. It can switch between grams and ounces so you can use it to measure meats, cheeses or veggies/fruits and also flour and sugar while baking. This thing is awesome. It is definitely worth the money and a MUST HAVE for anyone who wants to watch their portions/lose/maintain weight loss or even just to have better baked goods!!
On a more serious note....
You guys....I have to tell you something. We, Husband and I, are not very healthy. For reals. I used to be....back when I was single and passed my time with a run everyday and was only cooking for myself and made a not-so-exciting but tasty version of fish or chicken and steamed broccoli almost daily. But, then I fell hopelessly in love......with someone who loves food as much as I do...maybe not as much, because y'all, I LOVE food. Each meal is spent thinking about what yummy deliciousness I will cook next. Great for my kitchen but not so great for my waist line. Since I met my darling husband, work out time got replaced with date nights (No regrets there though....Husband, I love you and you are completely worth all these pounds!!) I have consistently held on to about 12 to 15 pounds. (!!!!!!!!). I did manage to lose a majority of it for our wedding day but gained it ALL back on our honeymoon where we indulged and ate amazing food from Memphis BBQ to Sweet Potato Pancakes at The Pancake Pantry in Nashville. (Stop here for just a second, GO, GO NOW to Nashville and eat here. It is no joke, that I love Nashville like I love Austin. Please go there. Let us take you. When can you leave? Ready yet?) Anyhoo, back to the real subject here....the weight. While 15 pounds doesn't seem like much, it isn't just the pounds, it is the make up of my body that has changed as well. Broccoli was replaced with cookies and muscle was replaced with fat. Not pretty, people. I know what you are thinking.....it's really not much/should be easy to lose/people lose more weight than that all the time/what are you complaining about, etc. But, it is a lot to me and coming from someone who worked really hard to lose FIFTY pounds after I had my son, I was not going to let it continue to get the best of me. So, Husband and I have decided the time has come to revamp our lives and get healthy. Not just to lose weight, etc but with both of us coming from a long family history of diabetes, the sooner the better. So, why am I telling you all of this? Partially because of support. Partially to make a vow to all of you (to Husband, to my mom who I know reads this blog...Hi, mom!, to anyone else who might stumble along) that we are not "dieting", we are making a life style change to get healthy for our minds, our bodies, and our hearts. And, last but not least, if you come here for the cookin', we are still gonna be cookin' ...just know that we are gonna "lighten up" a little. I plan on taking our favorite recipes and trying to make them better for us but still be knock you socks off delicious. It can be done! I have no doubt about that! So, join us if you would like, follow along if you would like, make your own vow to get healthy and we will support you too!
So, stay tuned for some "Fitter Fave Foods", exercises, and inspiration to be peppered here and there in My McCarty House! <3
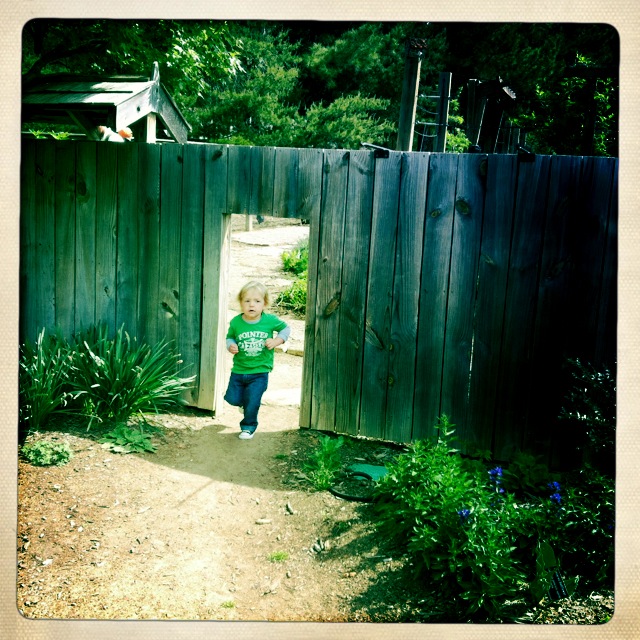
Botanical Gardens
The weekend before last, we headed over to the Botanical Gardens one morning to have a look around. If you haven't been there, please go! It is so pretty!! And, if you go before 1pm, I believe there is no cost to enter. We had a great time and it was really neat to see all the beautiful flowers in bloom and all of the different areas of the gardens.


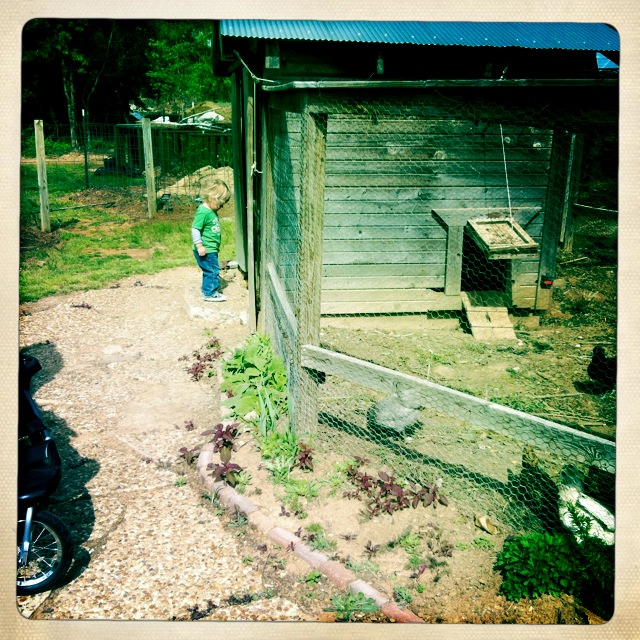
His favorite was the chicken coop and hen house. He was pretty fascinated by them. That apple didn't fall far from the tree!


Hi!
Photo Life

Strawberry Cupcakes made for Melissa's Birthday <3

Do you spy the attempted cupcake robbery here? That boy is quick!

The Easter bunny brought this light up Mickey Mouse toy and this is what I found one morning before school...

Have I mentioned we are a golfing family? This baby boy makes contact EVERY time he swings...and he also has more clubs than I do...in my golf bag (he outgrew his own little bag?!) That's ok, buddy, mommy will be your caddie :)

There weren't many people golfing this day so we let him run a little wild!
April 12, 2012
What We Read
During a super quick trip to the library this week on my lunch break, I grabbed a couple of books for the little man and I to enjoy this week until we can make our usual Saturday morning trip to pick out books together. (and, to tell the truth, my books were due and I HAD to go! Whoops!!)


Here are a few of our favorites from this week:
"The Day Dirk Yeller Came To Town" by Mary Casanova, available here
This book is so cute! A rough and tumble outlaw meets a brave boy named Sam. A great book promoting reading!
"The Gobble Gobble Moooooo Tractor Book" by Jez Alborough, available here
Are you guys seeing a theme in my favorite books? We like farm animals. Seriously, I would have a garden and livestock if a) I didn't live in the city and b) I had someone to teach me how to garden and have livestock. Any takers?? Back to the book, this is a really fun read about a group of adventurous farm animals playing on a tractor. Get your little one involved in reading this one and get ready for lots of giggles!!
"Oh no, George" by Chris Haughton, available here
This book doesn't have a long story but I loved the illustrations and the simple lessons of a dog named George getting in trouble while his owner is out.
We will be heading back to the library on Saturday so stay tuned for more books coming up next week!
Fave Foods-PW's Homemade Skillet Cornbread
Saturday, during baking-bonanza-palooza, I also had to whip up some dinner to feed Husband and our son. :) A popular favorite in our house is good ol' jambalaya and cornbread. Now, I am about to tell you something here that pains me......and y'all, I kid you not, PLEASE don't tell my Granny.......


I have never in my almost THIRTY years of existence, made cornbread from scratch.
SHOCK and SHAME! (excuse me while I compose myself)
You see we have always been a Jiffy family.....you know, this?
(photo from Jiffy web site)
And, while I will admit, I have always and still do love it's sweet cornbread flavor (and will continue to make it for my family), sometimes you need the not sweet variety.
Okay, moving on. Cast iron skillet in hand (y'all use on of these to cook? please do. You can even get them "pre-seasoned" now (goodness, please don't tell my Granny that either! ;), I set about making my first-ever batch. I turned to my trusty, hand dandy Pioneer Woman's cookbook, available here. No, I am not in any way shape or form sponsored by her or paid to say any of these things but I just like her a whole bunch and like her cookin'. (although, Ree, are you there? Can I come out to the ranch? You can wear your yoga pants!). I did not change her recipe at all, so I will refrain from repeating it on here but you can find it HERE and give it a whirl...please, please do. Here is a photo of our cornbread fresh outta the oven and gracious, it was GOOD! *Baker's note: please remember that your hot skillet will continue to cook the cornbread long after you take it out of the oven and please, do not be a ding dong like me and leave it in the pan, okay? unless you want a burnt bottom! (the cornbread not the other....this is a family site, you guys!)

Enjoy!! now, go, go NOW (!!) and try this...Tell Ree I sent ya!
Fave Foods-PW's "Patsy's Blackberry Cobbler"
Along with the Lemon Triangles, I also decided to make a cobbler for Easter Sunday. I found this recipe in Pioneer Woman's first cookbook, "The Pioneer Woman Cooks: Recipes From An Accidental Country Girl". As you all know, I have made (and loved!!) several recipes from this cookbook and they have all been a huge success so she is one of my go-to gals for home cookin' (P-Dub, if you ever read this by some grace of God, Thank you for being the bomb dot com). This recipe calls for blackberries but Husband suggested that I use peaches because peaches are a family favorite with his bunch. The original recipe can be found here. While this was delicious, yummy, and downright AH-MAZING, I would suggest that you NOT make this the day before serving. It was so easy and quick to throw together, PLEASE make it the day of. Perhaps it was my peaches or just user error (happens a lot in my kitchen I will admit!), but she got a little soggy overnight and I just feel like this would have been better served warm with a scoop of vanilla ice cream on top. Now, on to the good stuff!


Dear photo, why you no turned when I put you on here?!? :( harumph
Ingredients:
1 stick butter
1 3/4 cup granulated sugar
1 cup self-rising flour
1 cup milk
2 cups peaches (I used frozen peaches that I had thawed...maybe my reason for the sogginess?)
Directions:
- Melt the butter in a microwave safe dish
- Pour 1 cup of sugar and the flour into a medium mixing bowl and whisk in milk. Mix well.
- Add the melted butter to the flour mixture and whisk until well combined.
- Butter a 13x9 inch glass baking dish (use a lot of butter here, people, so it won't stick!)
- Rinse peaches and pat dry...really, really, dry if you can!
- Pour the batter into the buttered baking dish and sprinkle the peaches evenly over the top. Top with 1/4 cup of granulated sugar and bake for 1 hour or until golden and bubbly (check it, like I did not, as you can see by my edges in the above crooked picture!). When 10 minutes of baking time remains, sprinkle with an additional tbsp of sugar. Serve warm!
Enjoy!!
I will definitely be making this recipe again because a) as I mentioned above and as you can tell from the recipe, this is EASY to quickly put together! and b) that's just the kind of person I am.
Fave Foods-Imperial Brand Lemon Triangles
For Easter Sunday, I made several recipes...(actually, I made them on Saturday because of time but more on that later...) and one of them was a recipe I found on the back of the Imperial butter box for Lemon Triangles. I will be honest and say that when Husband wants lemon bars (or even when he doesn't and I just think about it at the store!), I usually grab the box.....I know, I know, the box of "stuff" you throw together to make a dessert. Now, there is absolutely nothing wrong with that and I have done it for a long time, but the older I get, the more I want to learn to make things from scratch. I just get a warm and cozy feeling making something homemade for my boys.....okay, so anyway...enough of that! On to the good stuff...LEMON!


Terrible pic courtesy of a mama who forgot to take a picture until it was time to go!
Ingredients:
2/3 cup Imperial butter, softened
2 1/2 cups granulated sugar
2 1/3 cups all-purpose flour
4 eggs
1/3 cup fresh lemon juice (I used the juice of 2 lemons and it was slightly less than 1/3 cup but it worked)
2 tbsp grated lemon peel
powdered sugar
Directions:
- Preheat oven to 350F
- Line a 13x9-inch baking pan (I used a cookie sheet) with aluminum foil then spray with non stick cooking spray and set aside.
- In a large bowl, with an electric mixer, beat butter and 1/2 cup of granulated sugar until light and fluffy, about 3 minutes.
- Beat in 2 cups of flour until fine crumbs form. Press into the prepared pan and bake, uncovered, for 20 minutes
- Meanwhile, in a medium bowl, with your mixer again, beat eggs, remaining2 cups granulated sugar, remaining 1/3 cup flour, lemon juice and lemon peel for about 4 minutes or until light and fluffy; pour over hot crust.
- Bake for an additional 25 minutes or until lemon mixture is just set *Baker's note: I feel like 25 minutes was a little long here. Please try baking this for about 15 minutes and checking it for "setness" (no, that isn't a real word, but in my kitchen, most of them aren't!)
- Allow to cool completely on a wire rack. Using foil, lift bars out of pan. Spray a knife with cooking spray (don't skip this like i did or you will make a mess!) and cut into triangles.
- To serve, sprinkle generously with powdered sugar.
Enjoy!!
Photo Life
Our week in pictures...

Blooms!

Roses are in full bloom at our house


Yum!

"Playing drums before church on Sunday

Hunting eggs at Mema and Papa's house

Our eggs!

We're with Miller!
April 4, 2012
Fave Foods-Stove Top Lasagna
Hello, all! Here is a recipe that I made for dinner last night that was a BIG hit in our house! One of my husband's favorite things to eat is Hamburger Helper. He loves the stuff and I usually have a box or two (or three!) in my pantry. It's not really that great for you and really, I just hated the idea of giving my family a box of powdered dinner with no veggies in it. This meal is adapted from a recipe on the Eat Better America website, found here. (I did half this recipe to make only four servings which was plenty to feed us dinner and even have some leftovers for lunch) I made some simple adjustments to a) suit Husband's like and dislikes and b) use up some produce I had purchased for another recipe that was not lasting as long as I thought it would....just being honest here, people!
Stove Top Lasagna
Makes 4 Servings
Ingredients:
1/3 medium onion, diced
1 medium green bell pepper, diced
1 medium zucchini, diced
8 oz Italian sausage (or you could use ground beef or even ground turkey to be healthier here)
1/2 of a jar of your favorite pasta sauce (I used Classico Spicy Red Pepper because I have yet to perfect a homemade recipe :/ )
1 1/4 cups water (plus a little more if needed)
1 1/2 cups uncooked no-yolk medium egg noodles
1/4 tsp Italian seasoning
1/8 tsp black pepper
1/8 tsp crushed red pepper (if you like your pasta to have a little kick and we really do!)
1/8 tsp garlic powder
1/2 cup part skim shredded mozzarella cheese
Directions:
In a large skillet or 4 qt Dutch oven (this is what I used because sometimes I am messy and this helps me keep everything in the pan!), cook the sausage, onion, bell pepper, and zucchini over medium-high heat until the sausage is no longer pink. Drain.
Add pasta sauce, water, uncooked pasta, and all the seasonings and bring to a boil, stirring occasionally.
Reduce the heat to medium and simmer uncovered for about 10 minutes or until pasta is tender. This is where I had to add about 1/4 cup or so more water after it had been simmering about 5 minutes. Let stand about 2 minutes then sprinkle with cheese and serve.
The great thing about this recipe too is there are endless possibilities. Husband actually had other plans for dinner but this smelled and look so good he ended up eating a little bit of it with us before he left! In my book, that is a success!
April 2, 2012
Fave foods-"Light" Graham Cracker Pie Crust
Here is a recipe I made this weekend that was super easy. The recipe came from a book I have mentioned on here before called "Secrets of Fat-Free Baking" by Sandra Woodruff, RD, available here. Sometimes I like to throw together a quick and easy dessert of a graham cracker crust and some pudding filling. Easy, breezy...you know what I mean. I had copied down this recipe but hadn't tried it yet so Friday while the boys were outside hitting golf balls (I'm tellin' ya....golf...all day, every day), I decided to give it a whirl (no pun on the food processor intended there!)
Ingredients:
Ingredients:
8 graham crackers
1 1/2 tbsp light butter or margarine, chopped into pieces
1 1/2 tbsp honey
Directions:
Preheat your oven to 350. With a food processor, blend the graham crackers until crumbly. Measure. There should be about 1 1/4 cups of crumbs. Add the graham cracker crumbs back to the food processor and add butter and honey. Blend until mixture resembles meal. Using a spoon (or your fingers), press the crumbs into a glass pie dish coasted with non stick cooking spray. Bake for 8 to 10 minutes or until edges are golden brown. Allow to cool then fill as desired. (These instructions are not verbatim from the book...I am just listing these from memory)
I let my pie crust cool and filled it with some sugar free vanilla pudding made with 1% milk and stuck it in the fridge while I made the rest of our dinner. This is a great light dessert and would be really, really good topped with some fresh strawberries or blueberries. I think because the crust does not contain much fat, it is a little more "crumbly" than a normal crust meaning it did not "hold together" as well as a normal crust would have. However, the taste was exactly the same so we didn't mind!!
Photo Life
Some photos from this week:

One very happy little boy (and his "Donda" holding him....note, that's her "grandma name". He couldn't say her real name and this is always what he said so he would never switch to calling her anything else!) learning how to hold and eat his own ice cream cone for the first time (truth be told, this is actually Mema's ice cream that he decided looked much tastier than his own cup of sherbet...Sorry, Mema!!)

Lots of watercolor painting

Cheese!!

Lots of golfing.
(side note if you don't know....this child golfs ALL THE TIME. He wakes up wanting to golf, we hit golfs balls after school, and after dinner.....)

Papa pushing the wheelbarrow*
*I know what you may be thinking here....yes, that is a beer in the background but, no, it is not Papa's...we don't drink and drive wheelbarrows around here, people!!

More golf (told you!) and some "sungwasses"....and giant mommy monster shadow
I do regret to inform you that these sunglasses met their demise shortly after this photo was taken....and we had our first lesson on not leaving your items in the middle of the living room floor where mommy, who is known to walk like an elephant, will step on them while racing out to the grill (steaks! Yum!) and break them :/
Sowwy, honey :(
Hope everyone had a terrific weekend!! <3
Weekend Recap and a DIY Project!
Happy Monday! This weekend was lovely! Lots of outdoor play time and a little bit of yard work. I made a few simple dinners (no recipes to share really although I did make a "lighter" graham cracker crust recipe that turned out pretty tasty! I will do a post for that one here in a sec).
One thing that we did get accomplished this weekend was revamping a porch swing that was left by the precious owners of the house. While Husband was busy power washing and mowing, I got to work.


One thing that we did get accomplished this weekend was revamping a porch swing that was left by the precious owners of the house. While Husband was busy power washing and mowing, I got to work.
Here is the photo of the porch swing before:

Not "bad" but had some rusty spots and just looked like she needed a little makeover.
Saturday during our routine shopping trips, I picked up some sandpaper and paint (I will go over this in a second) at Walmart and found some cushions at Target that I thought would be just right. While Husband had the power washer out, he gave the swing a quick sanding and washing and once it was dry, I got to work. The paint I bought was:
Rust-Oleum Universal Paint and Primer in "Oil Rubbed Bronze" (color #249131)
This stuff is awesome! It has good coverage and dries SUPER fast! It retails for $5.77 per can at Walmart and I ended up having to go back and get more. In total, it took me four cans to completely spray the entire swing. Still not bad! I bought three single seat cushions at Target that were on sale (Go, Go NOW!!! all their cushions are on sale this week) for only $12 each!
Here is the finished DIY'd swing:

Ta-daaaa!!
(please ignore our next DIY project....refinishing the patio..any ideas? tips?)
Here is the breakdown of our cost:
Swing $0 (thank you homeowners who were going to trash this when they moved)
Paint $23.08 plus tax
Seats $39.33 with tax
Grand total: $62.41
Absolutely, totally worth it as the three of us piled on the swing as the sun was going down last night and as my son says went "swingy, swingy" until bath time. Glorious <3
Subscribe to:
Comments (Atom)